Read time: about 18 minutes
When it comes to your Model Railroad or Model Railway, few elements, aside from the locomotives and rolling stock themselves, can add that element of realism like track ballast and weathering. The track on your Model Railroad layout is as much a focal point as the trains themselves, and the time spent working on this critical element will often set your Model Railway apart from all the others. Read on to learn how to realistically ballast your track in any scale with proven methods from Model Railway Techniques.com
First Things First: Study the Prototype
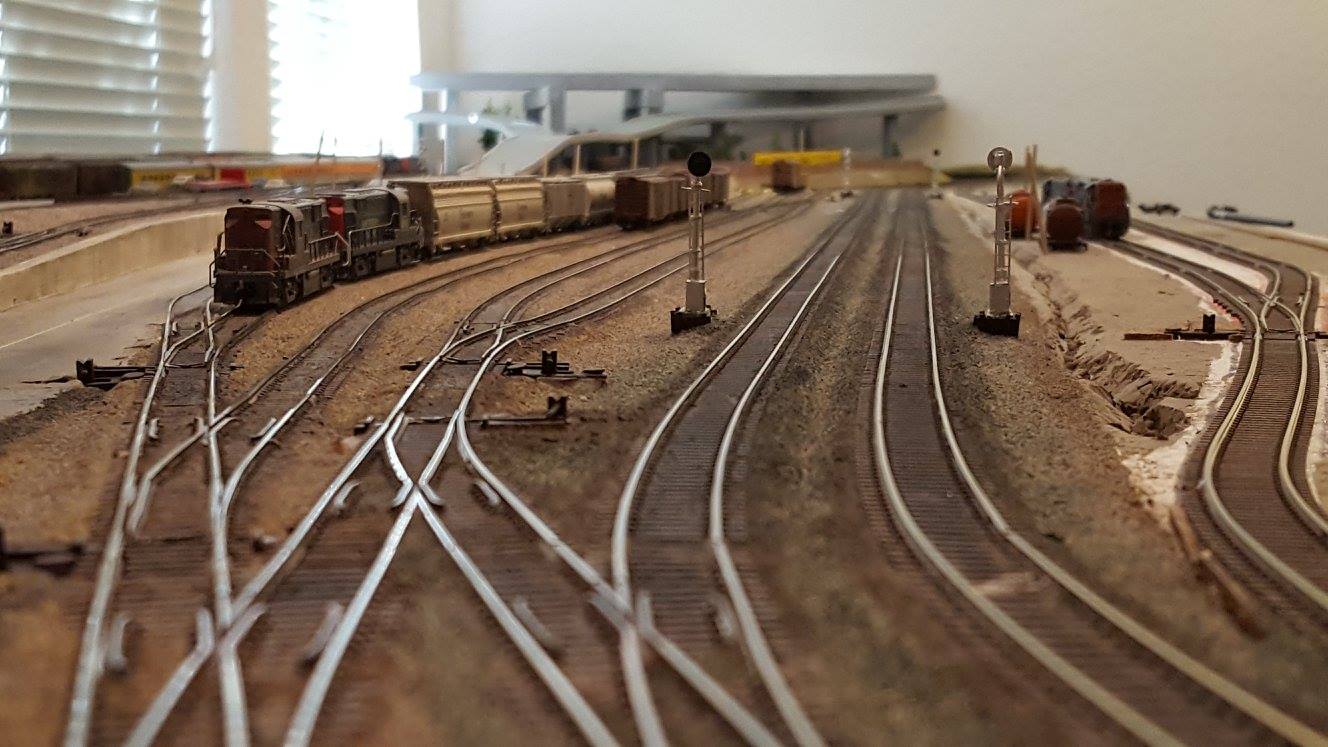
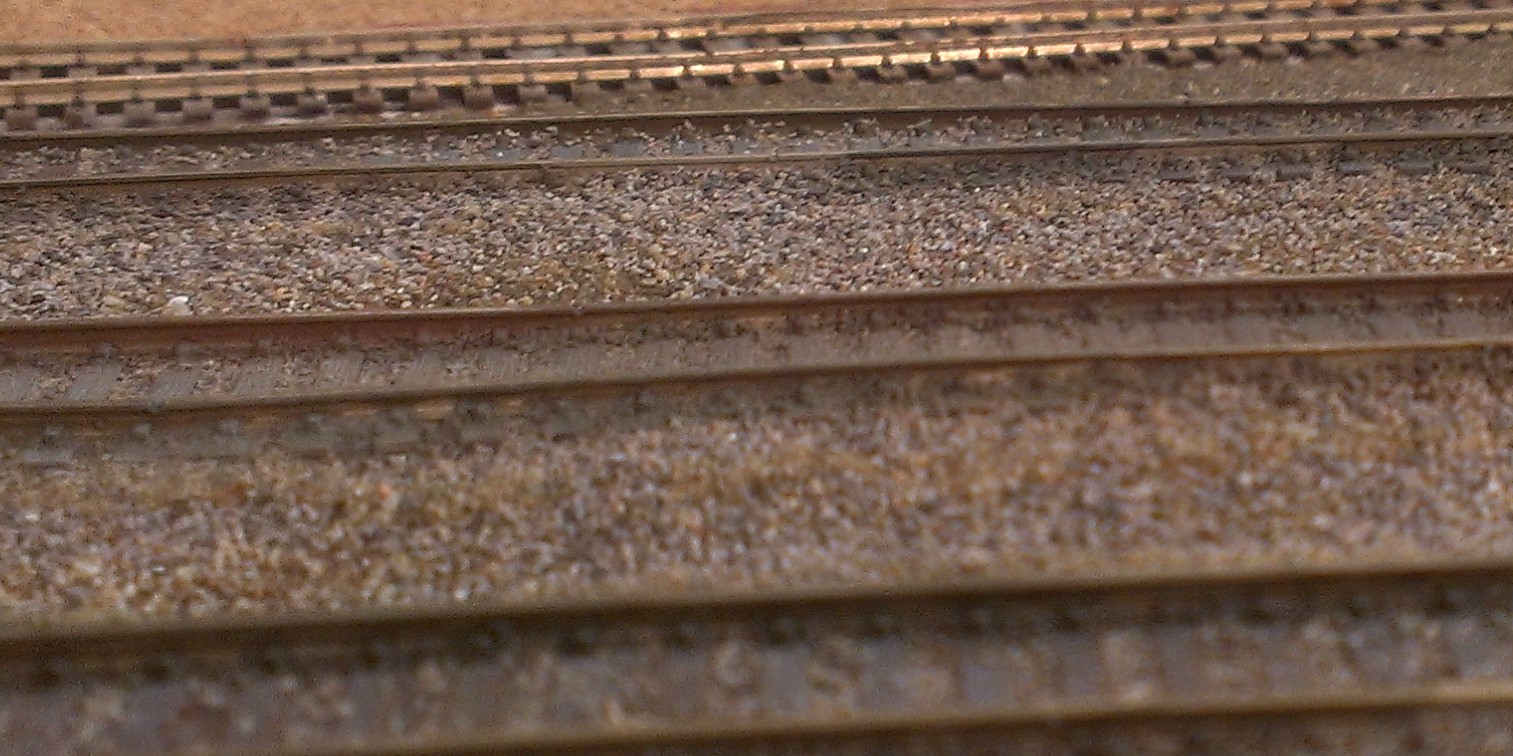
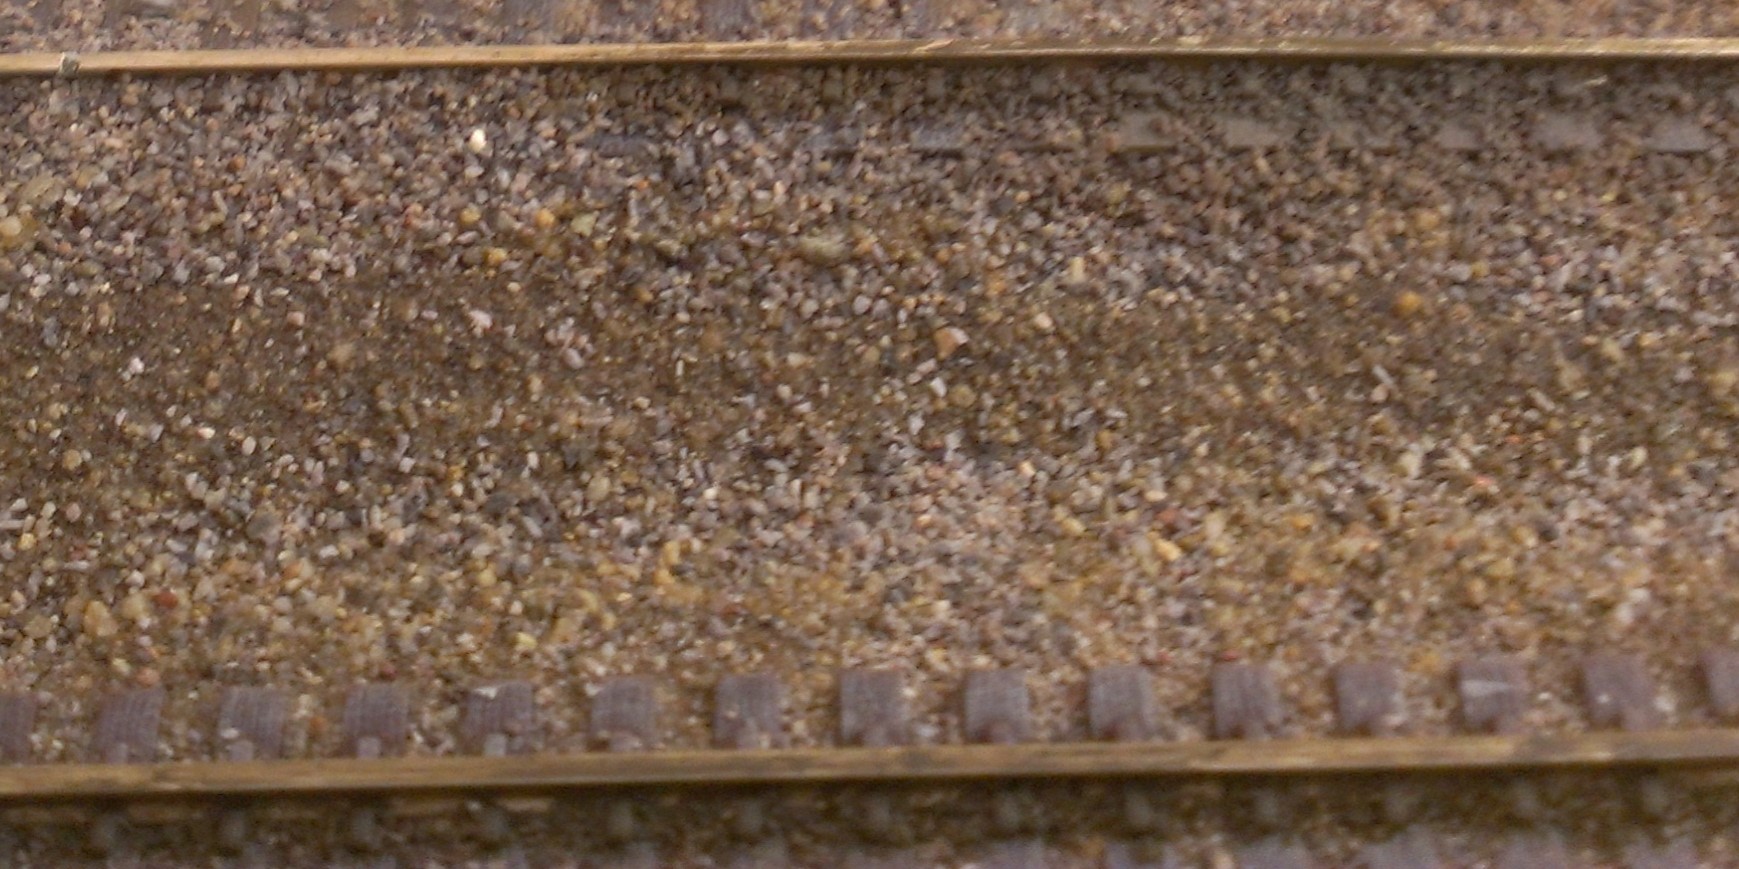
Ballasting the track on your Model Railroad should be approached with just as much planning and consideration as other areas of your layout as we recommend in our other articles, and one of the best ways is by studying prototype track. The pictures below show two different examples of track ballast profile, and the Model Railroad representation of those on my own N Scale layout. There are many photos here on our website, and on the web, that can provide you with all the information you need to accurately and realistically ballast your own Model Railway like the pictures below.


The Typical Railroad Roadbed Profile
Most casual observers don’t realize that typical railway tracks actually have two ballast profiles as seen in the illustration below. The two layers each serve specific reasons for both drainage ability to prevent flooding around the tracks, and also as added support for the ties or sleepers that the rails are laid on.
The type used usually depends on the trackage and anticipated amount of traffic on it, as well as the location of the roadbed. In the following examples we will show you how I recreate a typical heavy traffic mainline with both a sub ballast layer, and a top ballast layer as seen in the top of the illustration, representing a typical high traffic mainline railroad.

Before getting started on your ballasting project, consider doing some ‘dry runs’ with different colors of ballast. The color can have a dramatic effect on how your track looks, and unless you are recreating a certain prototype color this is a worthwhile investment of your time. Consider the differences between the two different color combinations below, simply by swapping the light for the dark and vice-versa.
Your track work should also be weathered first if you plan on doing so. This includes the rails and the sleepers themselves. I paint my rail by hand and have good results either painting the rail before or after applying ballast. I also weather all of my sleepers before track ballast is done, otherwise you will get the color on your ballast.


Below we will guide you step-by-step on how to ballast your track for the most realistic appearance. Patience is key, and you shouldn’t rush through this process. Work on short, manageable lengths at a time of about three or four feet. In this way you can complete sections and have your Model Railroad running again as you take a break, if needed, to focus on other aspects.
It should be noted that before you undertake any ballasting project ever, make sure to check and double-check your track work first for any problems. Correcting those now is far easier than it would be after your track is ballasted. The following is a list of some specific items you will need in addition to the ballast and roadbed of your choice.
An ultra-fine 3 or 4 inch pump style spray bottle such as those used for hand sanitizer or sunscreen; Used for wetting your ballast before applying glue mixture.
An empty or nearly empty Elmers glue bottle; Used for applying your glue mixture.
A plastic spoon; Used for distributing ballast.
A one-inch wide (for N Scale) makeup blush brush; Used for spreading your ballast.
A half inch wide soft bristle artist brush; Used for cleaning bits of ballast from around your track.
CREATING THE ROADBED PROFILES
If you are not interested in creating a sub ballast profile for your track, or simply want to ballast siding or spur tracks, skip directly to Applying the Track Ballast.
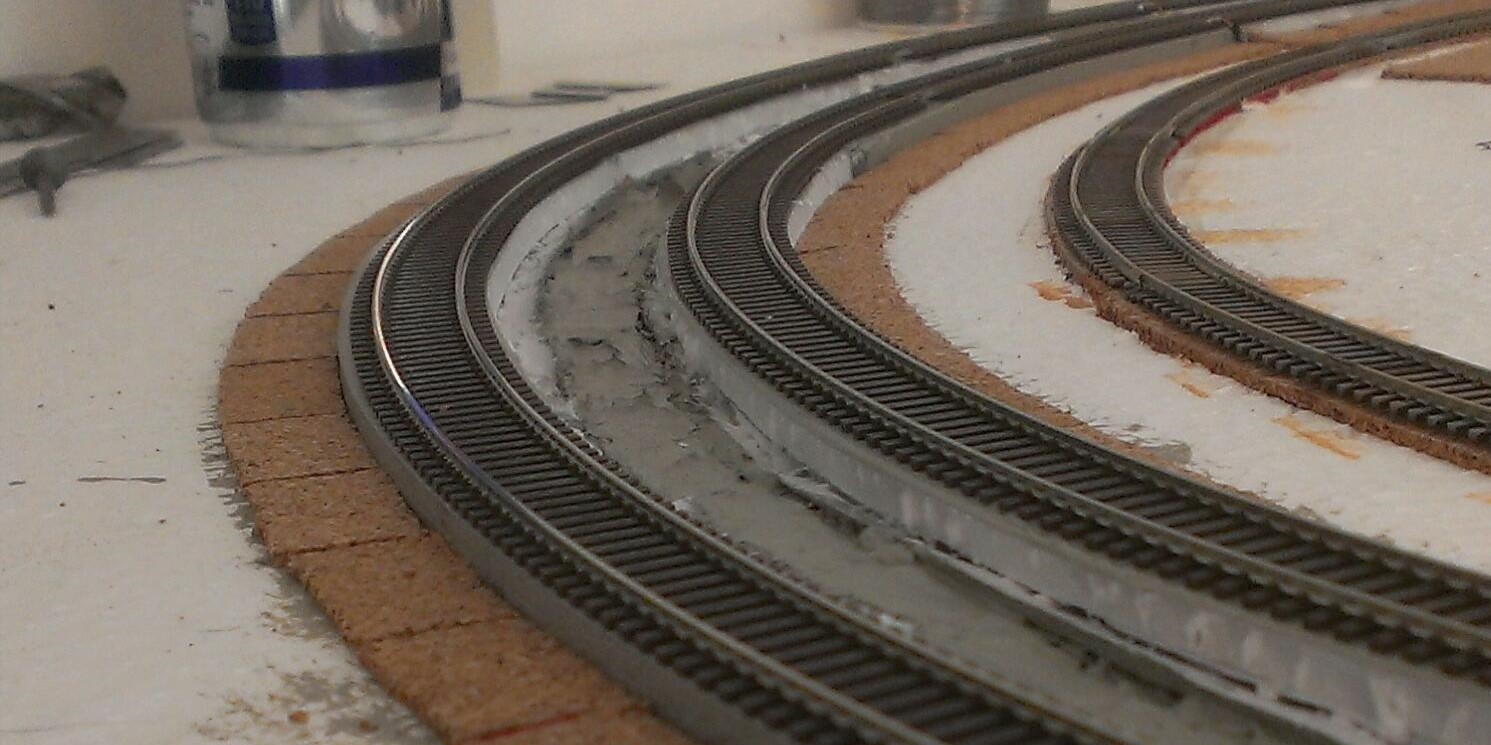
The Atlas code 55 N Scale track I use was laid on top of 1/4″ thick foam board like the kind you can get from any dollar store or other sources such as Walmart or craft stores. You could also use HO Scale cork if you want, splitting it and only using half for N Scale track. This was trimmed flush with the edge of the sleepers as seen in the photo below, the reason for this is explained further down in this article. The sub roadbed is 1/8″ thick cork, in this case, cut from self-adhesive style made for drawer liners. The strips are approximately 1/2″ wide.
For the curved sections, seen in the second photo below, the cork was cut into one-inch long lengths and applied in segments. This method provides the least amount of waste and doesn’t require cutting curves into the cork. The self-adhesive cork sped up the process but is not essential to this technique.
After the sub roadbed cork is installed, apply a thick layer of earth colored latex paint on top of the sub ballast road bed, and a little beyond the edges, about an inch or so. Immediately apply a base layer of initial ground texture of your choice. For my N Scale layout, and all of my base texture layers, I use real sifted dirt. Apply this layer generously and use your fingers to tamp it into the paint
The latex paint acts as a bonding agent for the texture, and also provides excellent adhesion to the layout base whether it’s foam or plywood. Any basic color of latex paint will work, and you can often find ‘mismatch’ paints at your local paint or hardware store for up to 50% off regular prices.

Once the latex paint has dried, thoroughly vacuum up all of the loose dirt using a shop vac or similar before spreading your sub ballast along the edge of the sub roadbed as seen below. This should be an evenly distributed continuous mound approximately 1/4″ tall for N Scale. Apply this with a plastic spoon, I use the side, gently tapping the spoon with my index finger to control how much falls off the side.

Using your finger, even out this layer of sub ballast, letting it create a natural slope on the edge of the 1/8″ thick cork. Also make sure that this layer continues to the edge of the thicker 1/4″ roadbed the track is laid on as seen in the photos below. The goal is to create a thin flat layer over the initial texture layer you applied in the steps above. It’s ok if some of your base texture shows through, as this will add more realism and is actually common on prototype track.
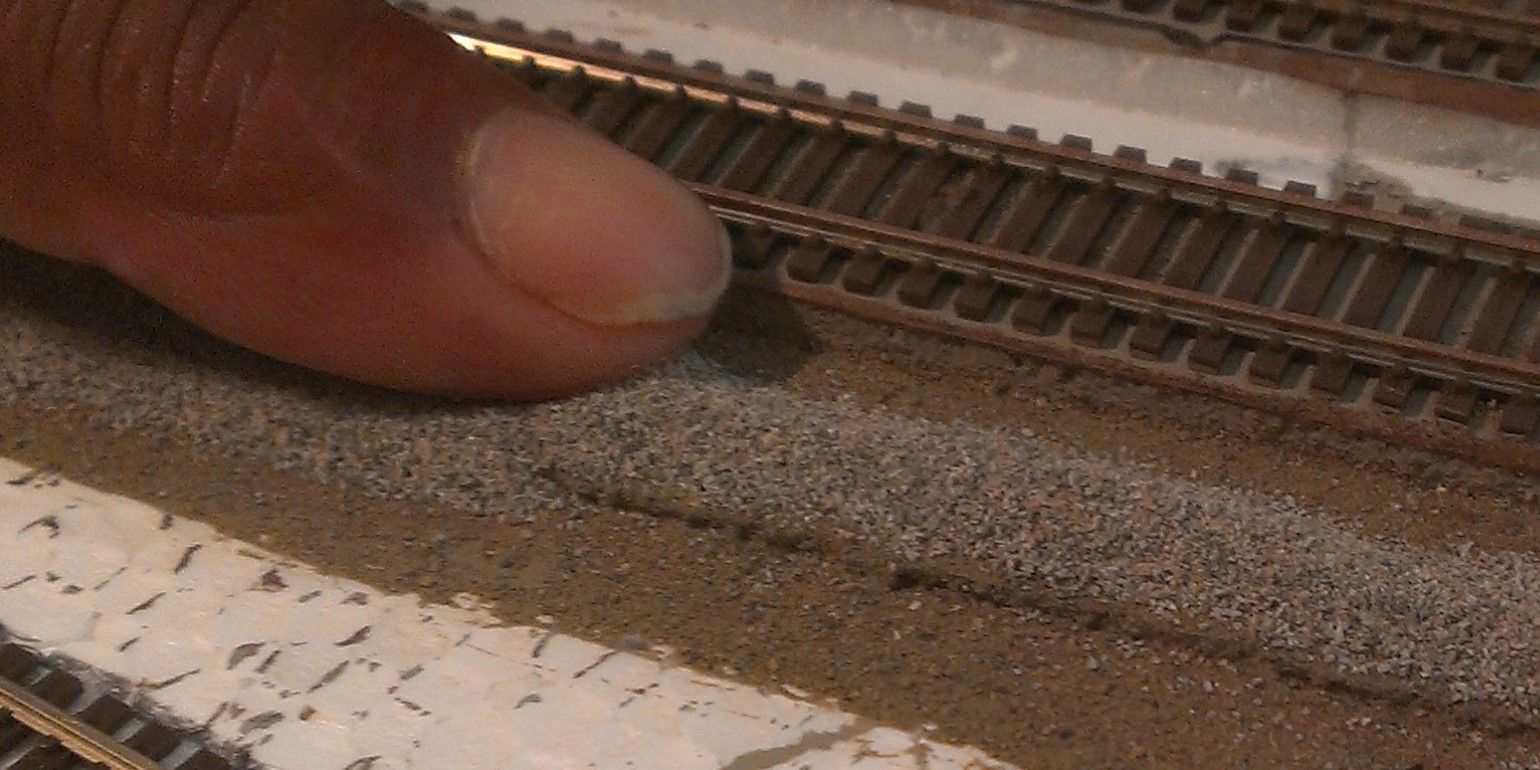
In the photo below you can see how the sub ballast creates its own natural slope as you push the mound along with your finger, flattening it out. You need this natural slope to completely hide the edge of the 1/8″ cork. Don’t worry about the tiny ridge that may remain on the edge of the cork as seen in this photo, the next step will take care of this.

The completed sub ballast should resemble this. As a final step to leveling it out, use a small scrap of dense foam, or a foam makeup wedge to lightly tamp it down and eliminate any tiny mounds left along the edge of the 1/8″ cork as seen in the photo above. At this point you are ready to apply your actual track ballast, the sub ballast is not glued down until the final process and will remain loose at this point.

Applying the Track Ballast
The first process in the actual track ballasting is to spread your ballast. Using a plastic spoon and the side pouring method mentioned above, mound your ballast in the center of the track only as seen below. You should do a bit of experimenting as to how much you need, it depends on the height of your sub roadbed under your track. In my case, using 1/4″ sub roadbed, the mound is about 1/3″ tall.

When working around your turnouts, leave some empty space for the next step below. You want enough ballast in these areas to just come up to one or two sleepers of the point throw bars. Never apply any ballast to the throw bar area as this will cause serious problems with your turnouts functioning properly and can potentially ruin them. See the photo caption below.

Using a one-inch-wide makeup blush brush, push the ballast along the track. Keep the brush vertical to your track, and do not apply too much downward pressure. The goal is to let the bristles of the brush just skim across the outer ties and let the ballast create its own natural slope.
This is the reason that the sub roadbed is cut square along the edge of the sleepers in the initial steps above. Do this is one continuous motion of approximately 6-to-8-inch sections, then go back and brush any remaining excessive amounts left between the track forward to the mound where you left off. You can use the blush brush for this, being careful not to disturb the side profiles, or the 1/2″ wide soft bristled artist brush.
If you notice that there are voids, or the edges of the sub roadbed are not completely concealed, add a little more ballast between the tracks. With a little practice you can judge the proper amount needed to create a consistent shoulder on each side of your track.

After spreading the ballast around your turnouts using the method above, use your soft bristled artist brush to clear all remaining ballast from between the frog rails, guardrails, and point rails. Also check for ballast along the inside of the rails, since if these are not removed and subsequently glued in place, your wheel flanges will hit them. This is especially important with lower rail profiles in all scales.

Applying the Glue Mixture
This step is the most critical in any ballasting process and one that often intimidates people and prevents them from ever ballasting their track, or not having success and having to deal with unsatisfactory results. I have used these methods on every single layout I have built in my 45 years as a Model Railroader and have always gotten consistent results. Ballasting takes patience, and there is no rule saying you have to complete all of your track at once. Work at your own pace, follow the recommendations below carefully, and you will see the difference of how realistically ballasting your track can be.
Once you are satisfied with the application of your ballast and you have cleared all of the loose bits from the areas noted above, the final step is to glue everything together. We recommend using a mixture of 2/3 water and 1/3 Elmers white glue. Preparing this mixture in an old glue bottle, you can use a black sharpie to make a mark on the side that is about 1/3 the volume of the bottle of your choice.
Pour your glue in first up to that mark, and then fill the rest with water. Add about a tbsp. of rubbing alcohol to this mixture to help break the surface tension of the water and aid in absorption. Shake this mixture well until all of the glue at the bottom is thoroughly mixed with the water and rubbing alcohol. You should also shake occasionally during use to keep everything mixed well.
Before you apply this mixture, you must completely dampen the ballast following the procedure below. Use a fine mist sprayer filled with approximately 4 parts water and 1 part rubbing alcohol. The exact proportions are not super critical, but you should add enough rubbing alcohol do detect its odor.
Working on about 12-inch sections at a time, begin misting your ballast from above, about 8 inches away. Letting the fine mist fall from above will prevent disturbing the ballast. As it begins to dampen, indicated by darkening of the ballast, you can move the sprayer closer to your track. Make sure it is thoroughly dampened, but you don’t want any pooling of water. The quickness of the absorption rate is a good indicator of when the ballast is dampened all the way through.
Next, apply your glue mixture in the center of your track using your glue bottle. Adjust the rate of flow by barely twisting the tip open. Test this on a scrap of cloth or paper towel, you want the mixture to just drip out with very little pressure applied to the bottle. You will see the mixture quickly absorb into the ballast and virtually disappear almost immediately.
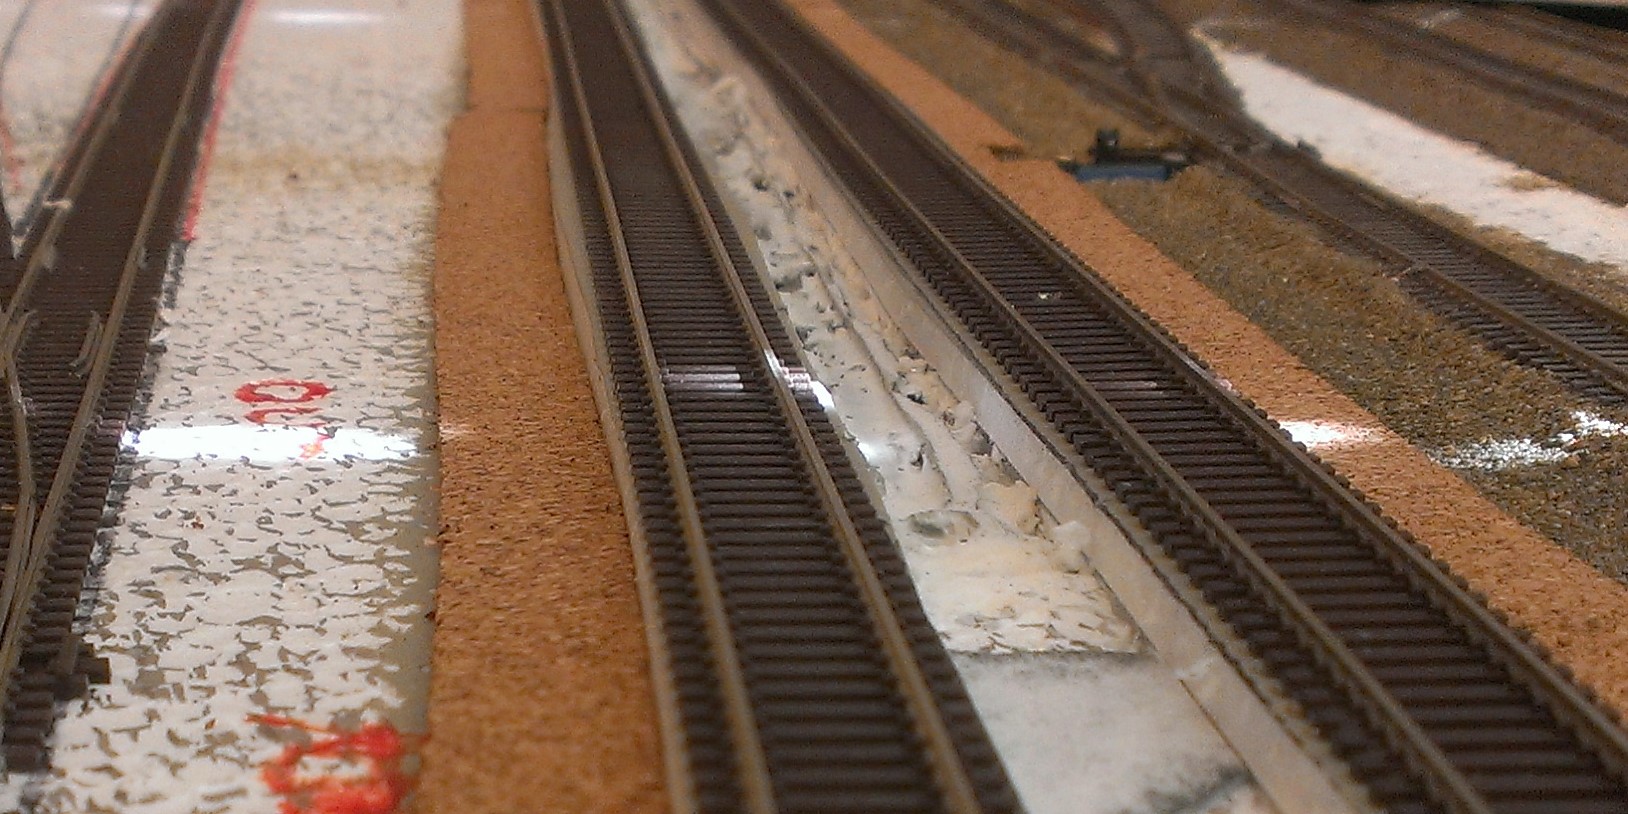
You need to keep reapplying this mixture, working back and forth across the small section of track, until the absorption is almost zero and glue mixture appears milky white and no longer absorbs quickly as in the photos below. You will also notice that due to the capillary action, some of the glue mixture will begin to saturate the ballast shoulders also.
Keeping the same setting, carefully drip the glue mixture at the base of the ballast shoulders, not along the slope. Again, you will see the capillary action as the mixture expands outward and upwards joing with the mixture applied between the tracks. Usually I will apply drops every half inch or so, and then go back and add drops in between if the mixture has not drawn itself togehter.
If there are areas where the ballast shoulder does not appear to be saturated enough, carefully apply the glue mixture along the outside of the rails by gently dragging it along the ties. You must be careful with rate of application though, as too much will cause the ballast to sluff away from the the roadbed, exposing the edges.
Continue to add this glue mixture until everything is completely saturated and milky white. Don’t be alarmed or concerned about this, since the glue mixture will continue to absorb downward and eventually dry and you will be left with no traces of it. If the ballast is not completely saturated in this manner, you will have dry, crumbly areas underneath, or worse, only a thin crusted layer of ballast that will crumble and fail later.
As you work around your turnout points, be especially mindful of the capillary action and make sure the glue mixture doesn’t get drawn into those areas. As a precaution to prevent stuck point rails, carefully work them back and forth as the glue is setting up. Use your fingers, or small tool to move the point rails simultaneously by hand and with the turnout control mechanism so you don’t put stress on either of them individually, as often you will find that they are sticky from the glue mixture as it begins to set.
If your point rails don’t close tightly to the stock rails, examine closely for any stray bits of ballast and remove them with a pick or suitable tool. You can also use a stiff bristle toothbrush to ‘scrub’ away stuck bits, but don’t do that too soon or you will only dislodge ballast from between the sleepers and cause more problems. Keep doing this repeatedly, checking on your points every ten minutes or so until there is no binding or stickiness, at that point everything will be fine.
As a final step in ballasting your track, check for leftover bits of stray ballast and remove them. Test your track for hidden or hard to see bits by rolling a piece of rolling stock or a single truck assembly along your track work to find them. Removal of these may require small metal tools or files, as the glue mixture is quite tough. Finally, always thoroughly clean your track using a shop vac or similar, this should be a regular regimen during any scenery building process to prevent loose bits from causing problems or lodging inside the gears of your locomotives.
The Finished Track
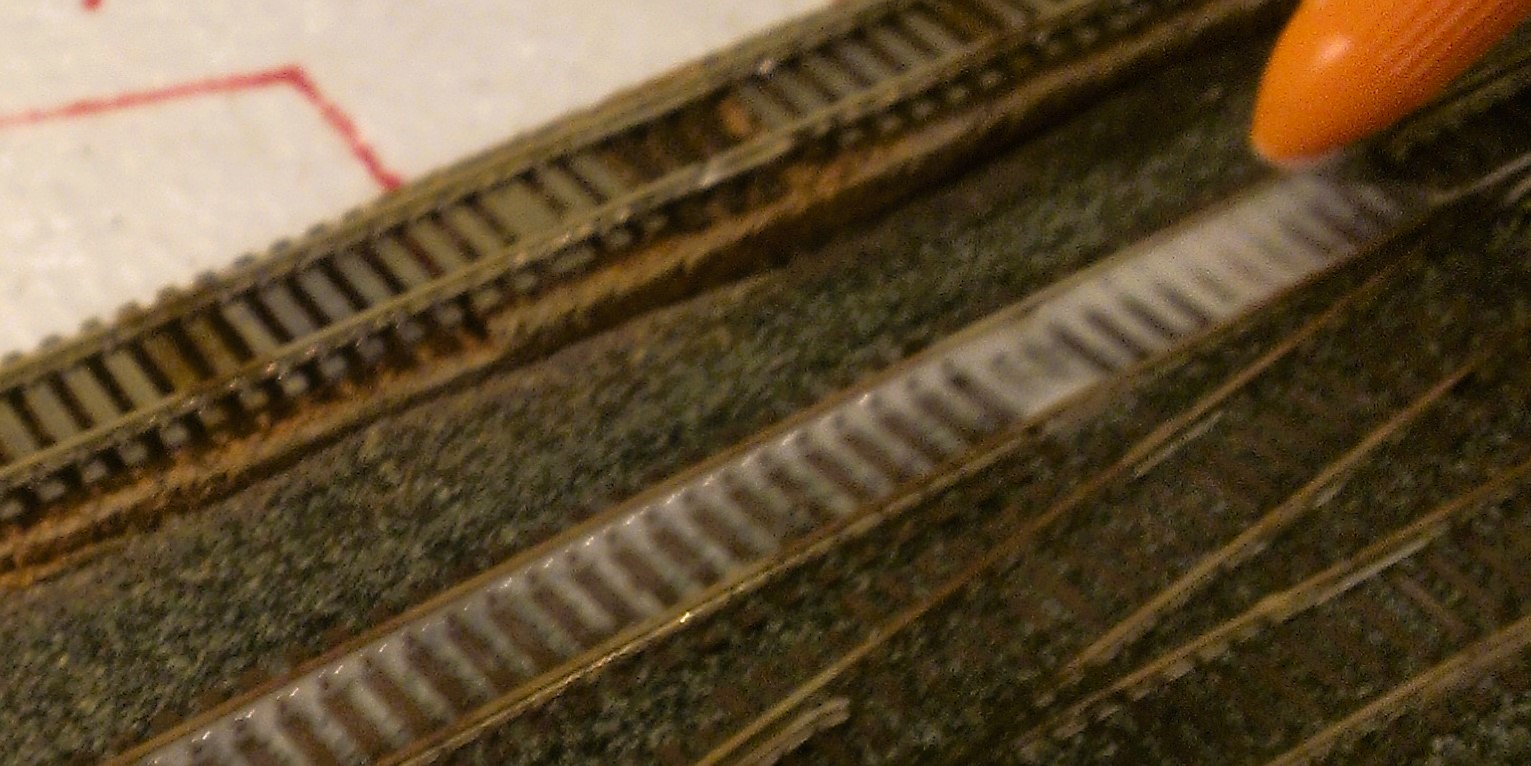
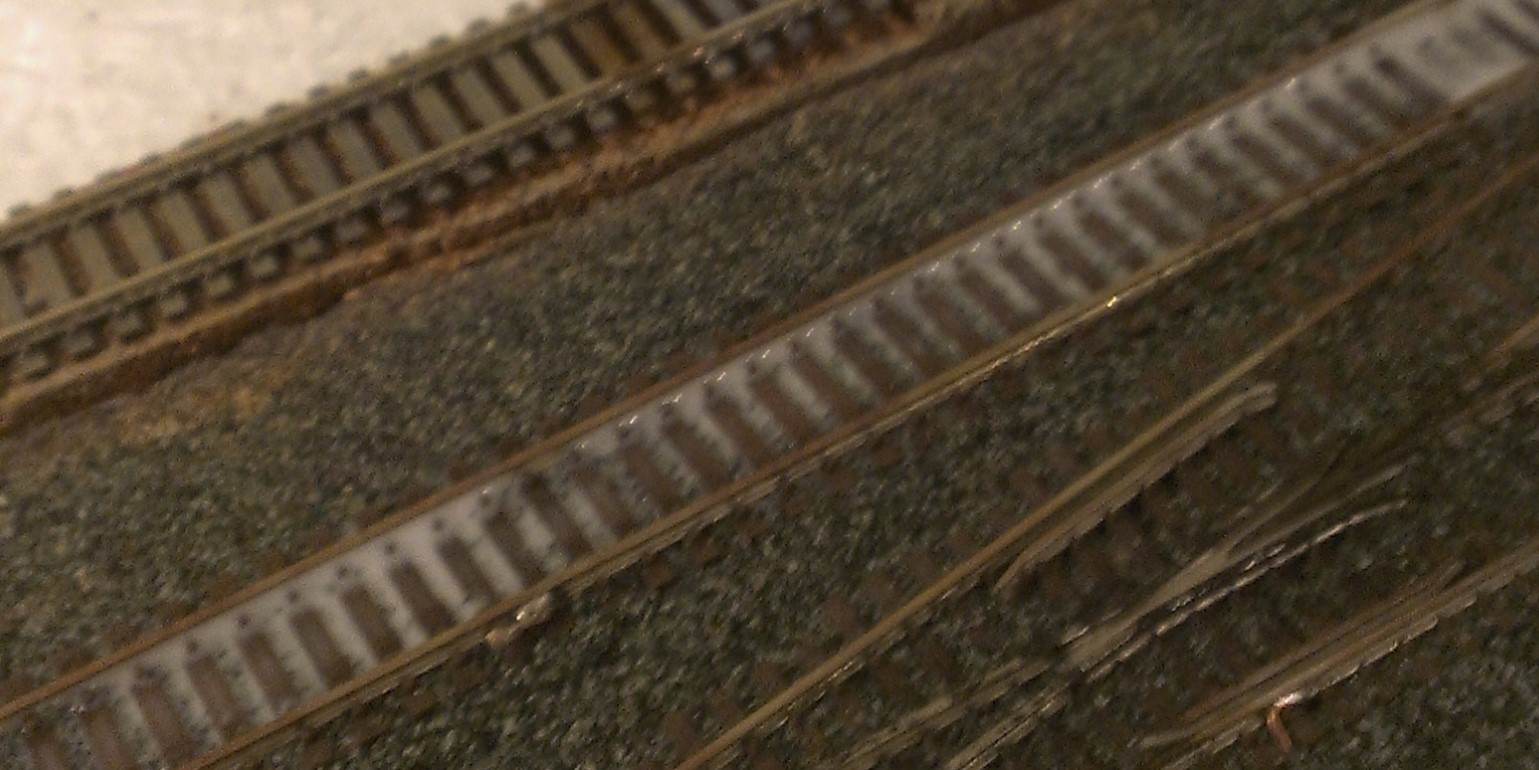
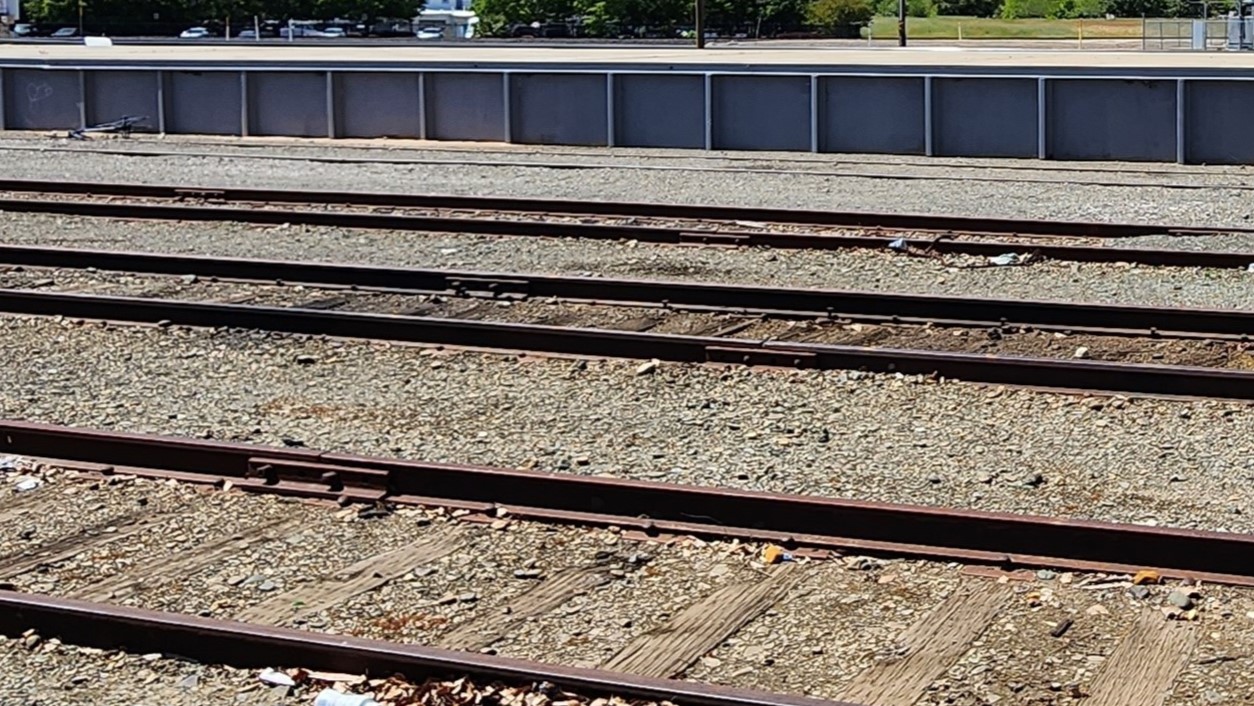
Below are some pictures of the completed ballasted track and some prototype pictures that were used as reference. The rails themselves are not painted yet in these photos, as I elected to weather them afterwards. There are pictures of fully weathered track, the focus of a future article, at the end of the page for you to explore.


In the two pictures below showing the model track work, and the prototype track, you can compare the sub ballast and top ballast profiles. There is no doubt that the added effort on the model representation considerably enhances the realism of the track work on my Model Railroad.


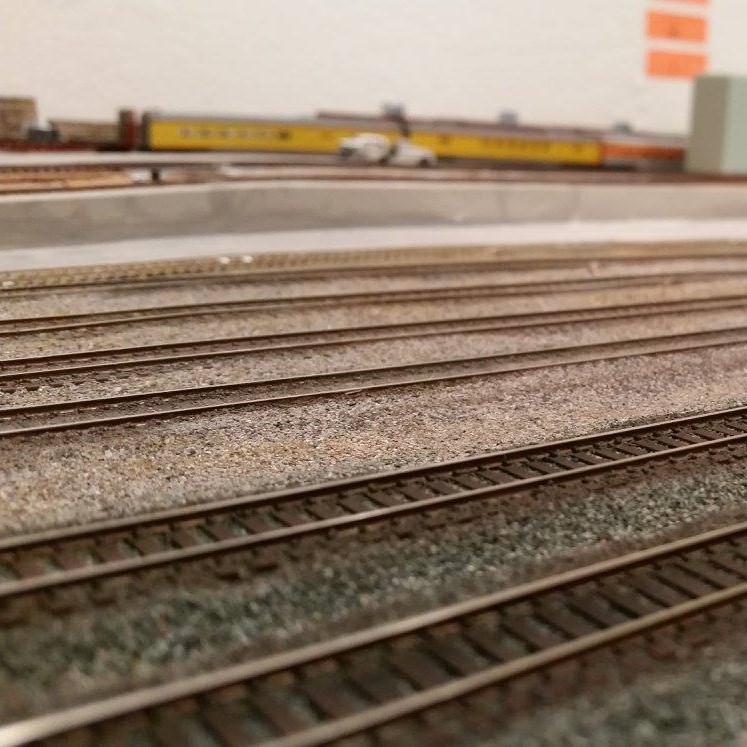
Color Variations and Weathering
Below are a few pictures of some of my completed weathered and ballasted track work. We will have an upcoming article on painting your track and sleepers, as well as reproducing the undulating track common on old industrial spurs and even some short line railroads, so be sure to bookmark our site or check back often.
We hope you enjoyed this article on ballasting your track for realistic appearance and try some of our methods on your own Model Railroad. As with all aspects of this hobby, taking the time to learn techniques and having patience to learn them will pay off for you and give you more enjoyment as you build your own Miniature world.
Copyright 2026 The Model Railroad Benchwork Store/Model Railway Techniques.com All Rights Reserved
If you have any questions or comments regarding this article drop a comment down below and we’ll respond back to you.
Also, please share and click the subscribe button in the bottom right corner to receive automatic updates of new posts. Your email is confidential and will NOT be shared or redistributed.
James, Model Railway Techniques.com
Last Updated on 2 years ago ago by James from Model Railway Techniques

I loved your article on how to realistically ballast track on model railways. Your step-by-step guide and emphasis on studying prototype track for accuracy are invaluable. The suggestion of experimenting with different ballast colors and weathering the track before applying ballast is excellent. Your article is informative and inspiring. Thank you for sharing your expertise.
We appreciate your comment Eric and are happy you found the article interesting and informative. Be sure to check back often as we are adding new content all the time.
James, Model Railway Techniques.
This post offers valuable insights for ballasting the track on a Model Railroad. It emphasizes the importance of planning and studying prototype track for realistic results. The pictures showcase different track ballast profiles, providing visual examples. The post highlights the dual purpose of ballast for drainage and stability. The suggestion to conduct “dry runs” with different ballast colors is a practical tip. Weathering the track and sleepers is recommended for added realism. The post also mentions using segmented cork for curved sections. Overall, it provides valuable guidance for achieving realistic track ballasting on a Model Railway.
Thank you for visiting Model Railway Techniques and reading our article Liam, we appreciate the comment and positive feedback. It’s our goal to provide as much information as possible to help Model Railroaders in all scales achieve realistic and consistent results when building their own Model Railroads.
Thank you for this detailed guide on ballasting model railway tracks. The step-by-step instructions, along with the illustrative images, made the process much easier to understand. I particularly appreciated the tips on using the right materials and tools, as well as the advice on creating realistic effects. This article has been incredibly helpful for my model railway project. I look forward to more content like this!
Thank you Constanza, we really appreciate your comment. We strive to provide detailed, informative information for all Model Railroaders, and we are thrilled you found the article helpful! Hope to see you back again!
James, Model Railway Techniques.
Hi James,
I really enjoyed reading your article on how to realistically ballast your track. I’ve been wanting to do this for my own model railroad, but I wasn’t sure where to start. Your article was very informative and easy to follow. I especially liked the step-by-step instructions and the photos that you included.
I’m definitely going to try your method of creating a sub ballast profile. I think it will make my track look much more realistic. I also like the idea of using a spray bottle to wet the ballast before applying glue. This will help to prevent the ballast from flying everywhere.
Thanks for sharing your expertise with us! I’m sure your article will be very helpful to other model railroaders who are looking to ballast their track.
Thanks for leaving a comment, Jeffrey, We really appreciate it. We’re glad you found the article helpful and informative. We’d love to see pictures of your Model Railroad layout and post them on our site if you’d like. It’s always great to see other Model Railroaders layouts. If you’re interested, you can check out our page:
Contribute Content – Model Railway Techniques
Thanks again,
James, Model Railway Techniques.