Start your DIY Model Railroad Benchwork Table build the right way. Get digital PDF table plans with clear drawings, part details, and a master cut list so you can build accurately and save time.
When someone says “I bought plans, but they were confusing,” it usually means the plans didn’t separate two very different needs:
- How parts are made
- How parts are assembled
A strong plan system covers both clearly—and that’s the core idea behind our Digital PDF Model Railroad Table Plan Packages: a Comprehensive Drawing Set that’s organized like a real build process.
Part Drawings: the “fabrication” side of the job
Part Drawings focus on the individual pieces. They show material size, final length, hole drilling locations, and any unique markings required so you can produce repeatable parts without guesswork.
This matters because benchwork fails (or becomes frustrating) when “close enough” parts start stacking tolerances. These packages keep measurements accurate to within 1/16″ to support clean fit-up.
Assembly Drawings: the “how it becomes a table” side of the job
Assembly Drawings show how multiple parts combine into assemblies (example: an L-girder style leg), and they provide the measurements you need to build those assemblies correctly.
This is the difference between “a pile of wood parts” and an actual structure that goes together square, stable, and predictable.
Why photos are more helpful than people think
Even great drawings can leave someone wondering: “Am I interpreting this right?”
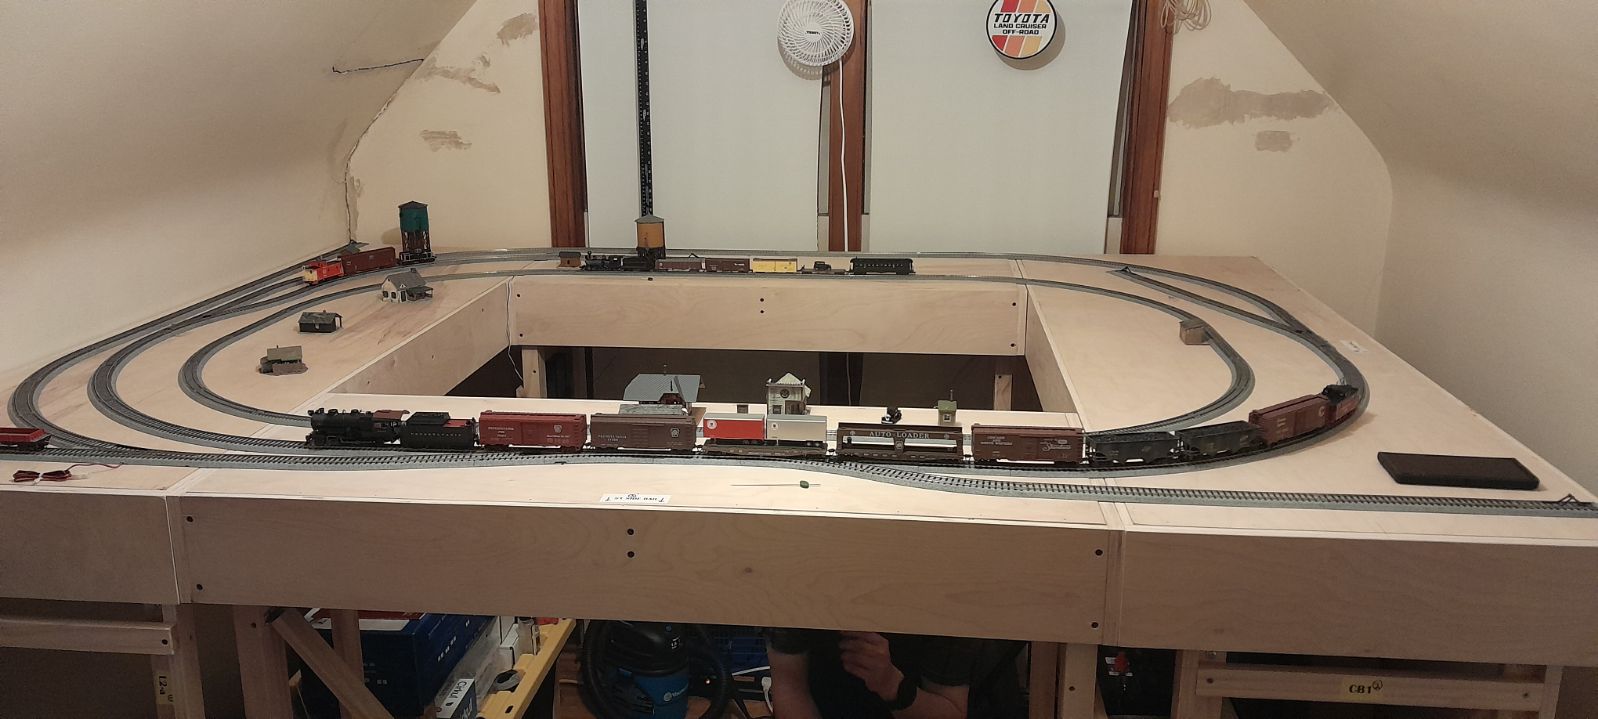
That’s why the plan packages include reference photographs of actual parts and completed assemblies—so you can sanity-check your progress visually.
The checklist builders actually want
If you like clear steps, here’s a simple way to approach the project:
- ✅ Confirm your space + table size
- ✅ Buy materials (¾″ cabinet-grade plywood recommended for sides/ends)
- ✅ Cut parts using the Part Drawings
- ✅ Drill holes and add assembly markings
- ✅ Assemble using the Assembly Drawings + diagrams
- ✅ Use the Master cut list to verify quantities and screw count before final assembly
Tools: hobbyist-friendly, upgrade if you want
You can build with common tools like a circular saw, drill, and sander. For even more precision, a table saw and miter saw help a lot, and a drill press/router can speed up repeat work.
And if you don’t have tools or shop space, you can hand the plan package to a local woodworking shop for fabrication.
Recommended materials
- ¾″ cabinet-grade plywood (birch or maple) for strength/straightness
- Kiln-dried pine/whitewood for other parts
- Avoid hardwoods where end-fastening is required (splitting risk)
Build the foundation once—enjoy the layout for years
Benchwork isn’t the “exciting” part of model railroading… until it goes wrong. A better drawing set makes it go right the first time.
Choose one of our Digital PDF Model Railroad Table Plan Packages today and take the frustration and guesswork out of building.
Further Reading:
- 9 TIPS FOR CHOOSING AND BUYING LUMBER FOR YOUR MODEL RAILROAD TABLE – The Model Railroad Benchwork Store
- LAYOUT SHAPES – The Model Railroad Benchwork Store
- Choosing A Theme For Your Model Railroad – The Model Railroad Benchwork Store
Copyright 2025 The Model Railroad Benchwork Store/Model Railway Techniques.com All Rights Reserved
PDF Benchwork Plan Packages, Digital PDF Model Railroad Table Plan Packages, “PRO” Digital Benchwork Plan Packages, Model Railroad Benchwork Cut List & Plan Generator, EZ-FOLD NTRAK Modules, EZ-FOLD Free-Mo Modules, and The Model Railroad Benchwork Store are Trademarks of The Model Railroad Benchwork Store/Model Railway Techniques.com and may not be reproduced, copied, or redistributed in any way without prior written consent by The Model Railroad Benchwork Store/Model Railway Techniques.com
Last Updated on 2 months ago ago by James from Model Railway Techniques